Appearance
Creating a New Campaign
Follow these steps to create a Voluum campaign from scratch.
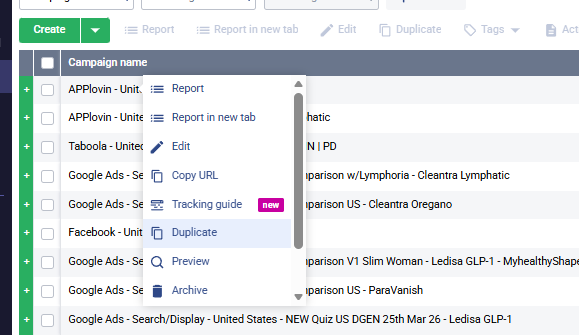
💡 Shortcut — Duplicate an existing campaign
The fastest way to create a new campaign is to duplicate one that already works. From the campaign list, select a similar campaign and click the "Duplicate" button in the top toolbar. Then just update the campaign name, traffic source, and destinations.
Use this whenever you're running the same funnel for a new traffic source, GEO, or test variant.
Step 1 — Open the Campaign Creator
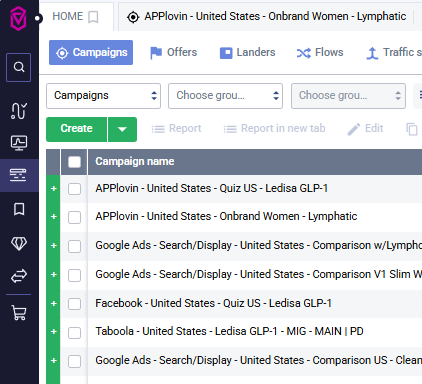
- Log in to your Voluum dashboard
- Click the "Create" button (top-left, above the campaigns table)
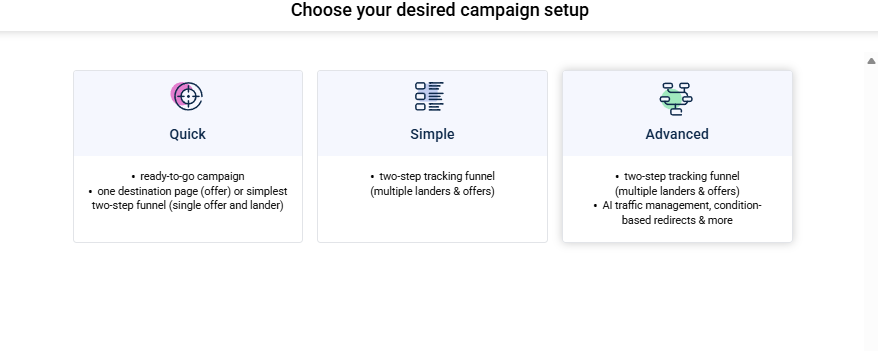
Step 2 — Choose Your Campaign Setup Type
Voluum will show a modal with three setup options:
| Option | What You Get | When to Use |
|---|---|---|
| Quick | Ready-to-go campaign. One destination (offer) or simplest two-step funnel (single lander + offer). | Only when you need a fast single-offer campaign with no testing. |
| Simple | Two-step tracking funnel with multiple landers & offers. | When you need basic split testing but no advanced routing. |
| Advanced ⭐ | Two-step tracking funnel, multiple landers & offers, AI traffic management, condition-based redirects and more. | Recommended default — unlocks split tests, rule-based paths (e.g., California split, non-organic redirect), and all advanced features. |
Pick Advanced
Always choose Advanced unless you have a specific reason not to. It gives you access to split testing, rule-based paths, and AI optimization — the features you'll likely need as the campaign grows. There's no downside to starting with Advanced.
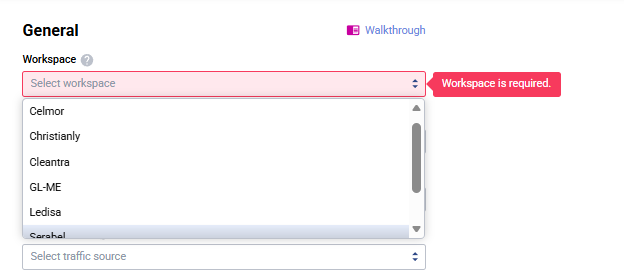
Step 3 — Choose a Workspace
Select the workspace that matches the brand you're running the campaign for. Workspace is required — the form will show an error until you pick one.
Currently available workspaces at Acentecom:
| Workspace | Brand |
|---|---|
| Celmor | Celmor brand campaigns |
| Cleantra | Cleantra brand campaigns |
| GL-ME | GL-ME brand campaigns |
| Ledisa | Ledisa brand campaigns |
| Serabel | Serabel brand campaigns |
| Wellanova | Wellanova brand campaigns |
WARNING
Pick the correct workspace — it determines reporting scope, access permissions, and domain settings for the campaign. Campaigns in the wrong workspace are a pain to move later.
Step 4 — Name Your Campaign
Acentecom uses a consistent naming convention across all campaigns so they're easy to filter, report on, and identify at a glance.
Format
[Traffic Source] - [GEO] - [Campaign Type / Angle] - [Brand Product]For Google Ads include the sub-type (Search/Display):
Google Ads - Search/Display - [GEO] - [Angle] - [Brand Product]Real examples
| Name |
|---|
Facebook - United States - Quiz US - Ledisa GLP-1 |
Google Ads - Search/Display - United States - Comparison US - Cleantra Oregano |
Taboola - United States - Ledisa GLP-1 - MIG - MAIN | PD |
Conventions
- Traffic Source:
APPlovin,Facebook,Google Ads,Taboola, etc. - GEO: Full country name (
United States,Global, etc.) — not country codes likeUS - Angle / Type:
Quiz US,Onbrand Women,Comparison US,Comparison w/[Competitor], etc. - Brand Product:
Ledisa GLP-1,Cleantra Oregano,Cleantra Astaxanthin,Serabel Balm,ParaVanish, etc. - Variants: Add
V1,V2,V3b,(based), or a date (25th Mar 26) at the end for test variants - Separators: Always use
-(space-dash-space) between segments
Consistency matters
Match the exact wording used by existing campaigns in the same workspace. If other campaigns say Comparison US, don't write Comparison - US or USA Comparison. Inconsistent naming makes reporting and filtering a nightmare.
Optionally add tags for additional filtering (vertical, test phase, etc.).

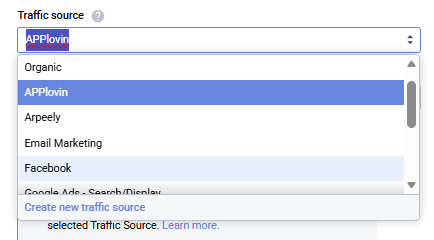
Step 5 — Select the Traffic Source
- Choose your traffic source from the "Traffic source" dropdown (Facebook, Google Ads, Taboola, APPlovin, etc. — they're already set up in Voluum)
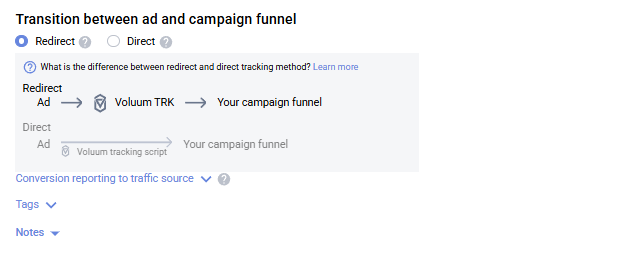
Step 6 — Choose Campaign Type: Redirect vs Direct
Voluum offers two tracking methods:
| Type | How It Works | When to Use |
|---|---|---|
| Redirect ⭐ | Visitor clicks your ad → hits Voluum's tracking URL → gets redirected to your lander/offer. | Default for everything — Facebook, APPlovin, Taboola, and most traffic sources. |
| Direct | Tracking happens via a JavaScript tag on your lander. No redirect, the user lands directly on your page. | Google Ads only — Google's policies don't allow redirect-style tracking URLs on the destination. |
Rule of thumb
Always use Redirect — except for Google Ads, which requires Direct.
Google Ads flags redirect URLs as a policy violation, which can get your ads disapproved or account suspended. For every other traffic source (Facebook, APPlovin, Taboola, etc.), use Redirect.
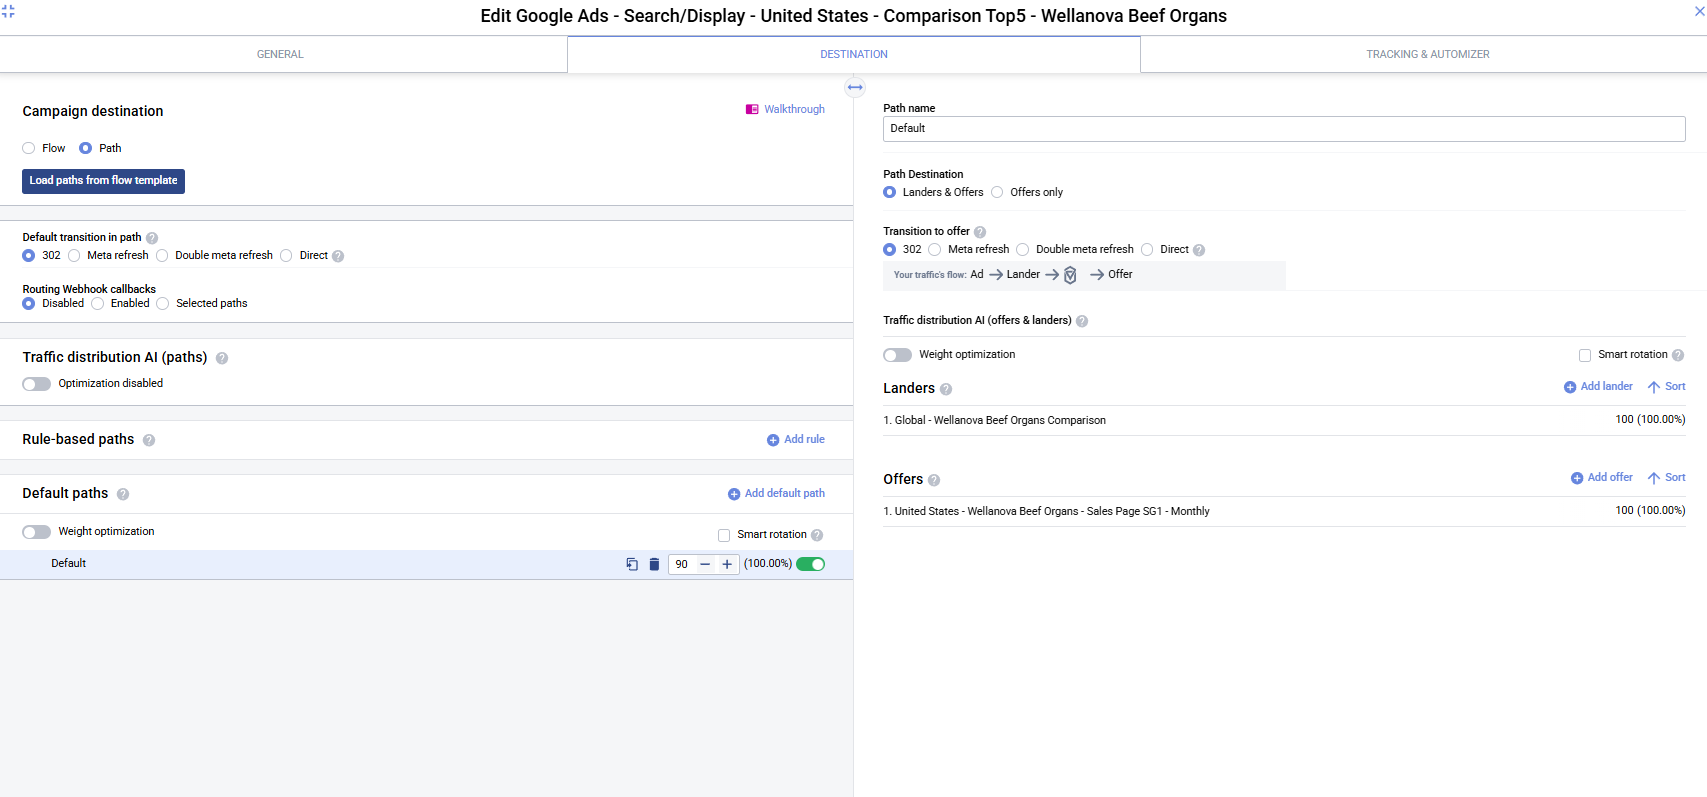
Step 7 — Configure the Destination Tab
Switch to the Destination tab. This is where you build the traffic flow — which landers and offers get shown, in what order, and under what conditions.
7a — Choose Flow vs Path
At the top of Destination, pick the Campaign destination type:
| Option | Use |
|---|---|
| Path ⭐ | Define the funnel inline inside this campaign (default choice). |
| Flow | Reuse a saved Flow template across multiple campaigns. Use "Load paths from flow template" if you already have one. |
7b — Set the Default Transition
Default transition in path controls how visitors move between steps (Ad → Lander → Offer):
| Mode | When to Use |
|---|---|
| 302 ⭐ | Standard temporary redirect — works for most cases. |
| Meta refresh | Use when you need to pass referrer data through. |
| Double meta refresh | Stricter referrer masking. |
| Direct | No redirect between steps — for Google Ads campaigns. |
7c — Add Default Path, Landers, and Offers
- Under Default paths, click "Add default path" (one is auto-created — "New path")
- Select the path on the left — the right panel shows its settings
- Path Destination: leave as "Landers & Offers" (or pick "Offers only" for a direct-to-offer funnel)
- Transition to offer: usually 302 (matches the default above)
- Click "Add lander" to attach a lander — see Setting Up Landers
- Click "Add offer" to attach an offer — see Setting Up Offers
- Adjust weights (100 = 100% traffic). For split tests add more landers/offers — see Split Testing
With Advanced mode
Because you chose Advanced in Step 2, you can also:
- Enable Traffic distribution AI (Weight optimization / Smart rotation) to auto-optimize winners
- Add Rule-based paths via "Add rule" (e.g., California split, non-organic redirect) — see Rule-Based Paths
Step 8 — Configure the Tracking & Automizer Tab
Switch to the Tracking & Automizer tab. Just pick the tracking domain — nothing else needs to be changed here.
- Select your tracking domain from the dropdown
- Leave every other field at its default — no other changes required
INFO
Voluum auto-generates the Campaign URL from the domain you pick. You'll copy it in the next step.
![]()
Step 9 — Save and Use the Campaign URL
- Click "Save" to create the campaign
- Paste the Campaign URL into your traffic source as the ad destination / tracking link
- Fire a test click to verify traffic is flowing correctly
Next Steps
Your campaign is now created. Continue with:
- Setting Up Offers — if you haven't already
- Setting Up Landers — if you haven't already
- Split Testing — take advantage of Advanced mode
- Rule-Based Paths — GEO routing, bot filtering, etc.