Appearance
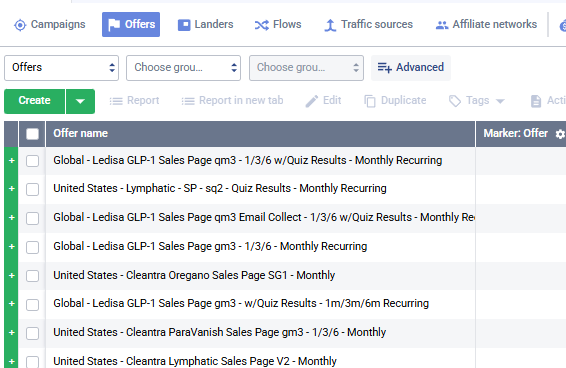
Setting Up Offers
An offer is the final destination page — the page where the user converts (typically a sales page or checkout on one of our brand domains, e.g., tryledisa.com, cleantra.com).
Step 1 — Navigate to Offers
- In the left sidebar, click "Offers"
- Click the "Create" button
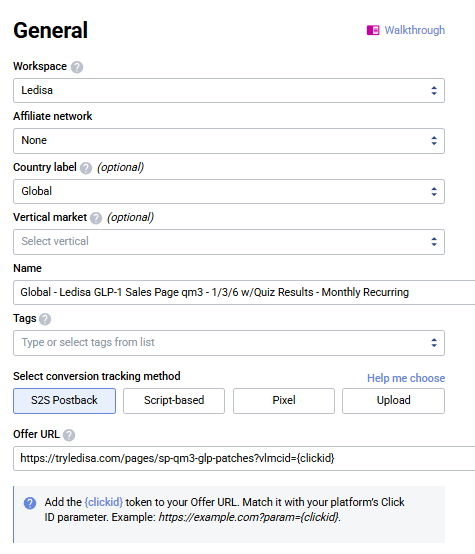
Step 2 — Fill In the General Tab
The offer creation form has two tabs: General and Tracking. Start with General.
Workspace
Pick the workspace that matches the brand (e.g., Ledisa, Cleantra, Serabel, Wellanova).
WARNING
The workspace must match the brand of the offer URL. Don't put a Ledisa offer in the Cleantra workspace.
Affiliate network
Leave as None — we run our own brand offers, not third-party affiliate networks.
Country label (optional)
Set to match the offer's target GEO — usually Global or United States.
Vertical market (optional)
Leave empty unless you're specifically using vertical-level reporting.
Name
Use the Acentecom offer naming convention:
[Country] - [Brand Product] - [Page Type + Variant] - [Funnel / Pricing Details]Real examples:
| Offer Name |
|---|
Global - Ledisa GLP-1 Sales Page qm3 - 1/3/6 w/Quiz Results - Monthly Recurring |
Global - Cleantra Oregano Sales Page v2 - 1/3/6 - Monthly Recurring |
Segments:
- Country —
Global,United States, etc. - Brand Product —
Ledisa GLP-1,Cleantra Oregano,Serabel Balm, etc. - Page Type + Variant —
Sales Page qm3,Sales Page v2,Checkout v1, etc. - Funnel / Pricing —
1/3/6(pack options),Monthly Recurring,w/Quiz Results, etc.
Tags (optional)
Leave empty or add tags if you use them for extra filtering.
Select conversion tracking method
Always use S2S Postback (highlighted by default).
| Method | Use |
|---|---|
| S2S Postback ⭐ | Server-to-server — our default. Most reliable. |
| Script-based | Only if S2S isn't possible on a specific offer. |
| Pixel | Client-side pixel — avoid, less reliable. |
| Upload | Manual CSV upload — one-off edge cases only. |
Offer URL
Paste the brand sales page URL with the {clickid} token appended:
https://[brand-domain]/pages/[page-slug]?vlmcid={clickid}Real example:
https://tryledisa.com/pages/sp-qm3-glp-patches?vlmcid={clickid}vlmcid is required
Every offer URL must end with ?vlmcid={clickid} (or &vlmcid={clickid} if the URL already has parameters). This is how the brand platform passes the Voluum click ID back for conversion attribution.
If this is missing, conversions will fire but won't tie back to the ad that brought the user.
Step 3 — Configure the Tracking Tab
Switch to the Tracking tab. Just pick the tracking domain — nothing else needs to be changed.
- Select the correct tracking domain from the dropdown
- Leave every other field at its default
Postback to traffic sources is already configured
You don't need to set up postback URLs per offer for Facebook, Google Ads, Taboola, or APPlovin — that's already configured at the traffic source level and automatically applies to every campaign using that source. The dev team doesn't need to do anything per-offer.
![]()
Step 4 — Save the Offer
- Click "Next" → review settings
- Click "Save"
- The offer is now available to attach to campaign paths